With the Cross|Up, you can use the Designer Software to remap your buttons. This is useful because you can map your buttons how you want, and all you have to do for button check is ensure you are on default controls!
However, since the Cross|Up has more face buttons than a traditional arcade stick, you have more options to work with - this helps you get the most out of your character or game, or simply can make the layout more comfortable and ergonomic for you.
Overview
Here is a the quick basics to button remapping. Below this is a more in depth process.
- Ensure your Cross|Up has the updated firmware: Updating Firmware on Cross|Up
- Open the Designer Software, connect your Cross|Up to your PC with the side USB port, then select "Load Controller" (top-left of window) - this will ensure you do not lose any settings and profiles you have already saved on your Cross|Up. In-dept guide: Loading and Saving Profiles on Cross|Up.
- Choose the profile you wish to edit in the "Select Profile" drop-down menu (top-left of window).
- On the layout itself, click the button you wish to change.
- A drop-down menu will appear - Double click what bind you want for that button.
- Repeat with any buttons you wish to edit.
- Click "Save Controller" (top of window) after you are finished.
You can remap all the buttons that you see on the layout to whatever functions available. That even means the stick! You can even disable buttons if you do not find any use for them. Do what feels best to you!
- - -
If you are having any issues with your Cross|Up Designer, please use our troubleshooting guide: https://www.hitboxarcade.com/blogs/support/cross-up-designer-troubleshooting. If this guide does not solve your issue, please reach out to support@hitboxarcade.com, or visit our Discord and post in the #tech-support channel.
In Depth Process
Starting Off
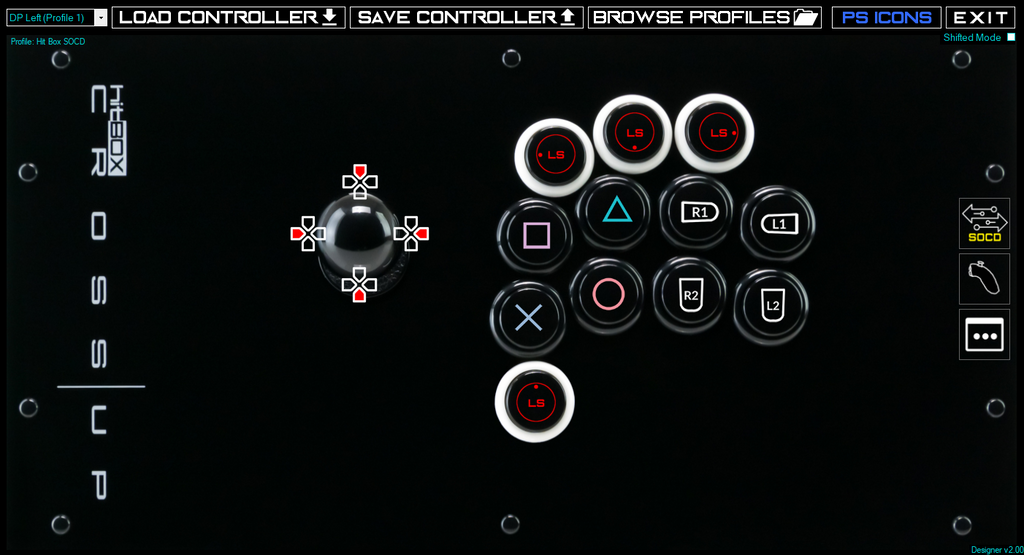
The Designer Software should look similar to this.
Before you start Button Remapping, ensure your Cross|Up has the updated firmware: Updating Firmware on Cross|Up.
Load Controller
It is good to make a habit of loading the values from your Cross|Up so you do not lose anything you have changed.
Plug the Cross|Up through its side USB port into your PC, then select "Load Controller" in the top-left portion of the Designer.
In-dept guide: Loading and Saving Profiles on Cross|Up.

Select Profile to Edit
In the top-left of the Designer window you will see a drop-down menu where you can select the profile you want to edit.

Click the drown-down arrow. Then choose the profile you wish to edit.


Remapping the Button


Save Controller

- - -
If you are having any issues with your Cross|Up Designer, please use our troubleshooting guide: https://www.hitboxarcade.com/blogs/support/cross-up-designer-troubleshooting. If this guide does not solve your issue, please reach out to support@hitboxarcade.com, or visit our Discord and post in the #tech-support channel.
For more information and guides on the Cross|Up Designer, browse through the Cross|Up Designer Index or use select the "Designer" tag at the bottom of this post.